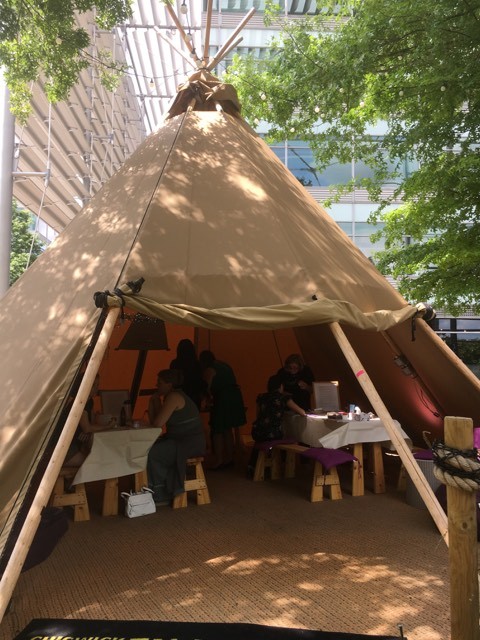
 Yes! a Bath Salts event in a Tepee! what fun!
On Friday the 12 July I hosted a Bath Salts Session in the tepee based in Chiswick Business Park - where the Young Living European Headquarters have their offices. We were expecting a few people, probably about 10, but oh my goodness! it tuned into a drop in session and we ended up with over 20 - in a tiny tepee!
Susanna Buss - head of Education at YL Chiswick - opened the proceedings by informing everyone that it was the 25th Anniversary of YL and explained about the quality of our oils. The day before, 11 July, was International Essential Oils Day - so that's what we were celebrating, just a day late!
I started off with some general information about salts, in that Epsom Salts were one of the best to use for bath salts, but to get the maximum benefit from Epsom salts, you had to remain in the tub for at least 20 minutes - and for even more benefit a further 20 minutes. Apparently, the first 20 minutes the body is detoxing and the second 20 minutes the body is absorbing some of the minerals, in particular magnesium from the Epsom Salts. Technically, Epsom Salts are not a salt at all but Magnesium Sulfate.
 Our first objective was to make a bath salt blend to nourish body mind and spirit after a long hard day at the office, school or just whenever you need to totally relax and unwind.
 The Rule of Thumb about quantities - only use a maximum of 5 drops of essential oil per bath .
Method : In a 4 oz jar, add 3 oz of Epsom Salts, or fine pink Himalayan salts or any fine salts of good quality. To that add 1 oz of vegetable oil - either V6 or coconut, or apricot kernel, something nice. Then add your blend of essential oils. There are so many blends you could choose - for the workshop I chose:
5 Drops of Lavender and
5 Drops of Cedarwood
If there were more time to explain more about the essential oils I would have chosen this luxurious blend (doubling the amount of salts - 20 drops of essential oils are enough for 4 baths at 5 drops per bath).
4 drops of Cedarwood
3 drops of Roman Chamomile
7 drops of Lavender
6 drops of Patchouli
The second formulation I gave the participants was a Morning blend to give you some get up and go on a Monday morning!
5 drops of Cedarwood again -good for grounding both mornings and evenings
5 drops of Orange - for uplifting and calming - (yes some essential oils can uplift and calm)
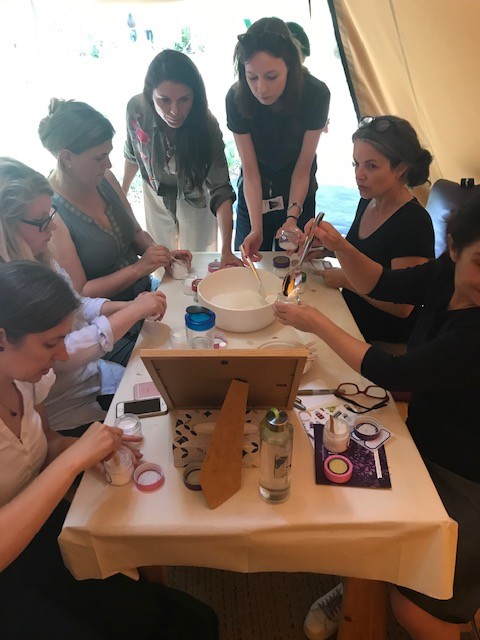
Here the students have filled their jars with the Epsom Salts and are now stirring in their 1 oz of vegetable oil. As water and oil don't mix, it is a good idea to add some vegetable oil as it gives the essential oils something to blend into, otherwise they would just float on top of the water, and this could cause some skin irritation to sensitive skins.
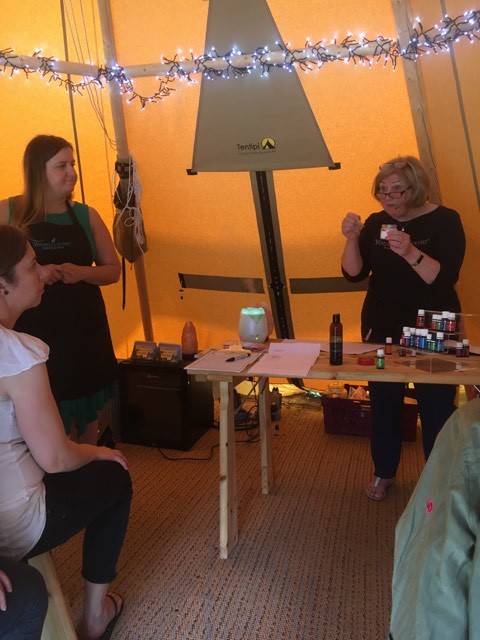
The picture below right shows me explaining about the blend with Susanna Buss looking on.
The next 'Make & Take' to be held at Young Living, Chiswick will be on Friday 13 September, 2019 - 5.30pm - 8.30pm - Workshop No. 1 in the 'Make & Take' Series
Please contact me or look under the Events tab for more information.
Suzie Webb
Nutrition Consultant & Clinical Aromatherapist

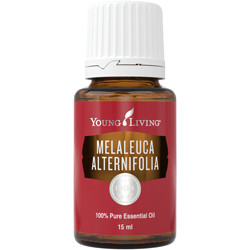
In my last blog we looked at the first 3 essential oils great for skin, Lavender, Frankincense and Cedarwood
and today I am going to share the next three essential oils great for skin. Please don't just read about them - use them!
4. Tea Tree
Traditionally used in skin care products for its cleansing properties, Tea Tree essential oil is great for all skin types but is especially suited for use on oily skin.
- Use as a spot treatment by placing a drop on the end of a cotton swab and dabbing lightly onto targeted areas of the face.
- Add 1–2 drops to your daily application of shampoo to nourish your scalp. Lather shampoo into hair and scalp, let sit a few minutes while enjoying its cool, tingly sensation, and then rinse
If you would like to buy some YL Tea Tree, please click here
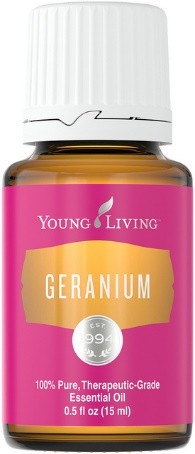
Geranium essential oil is a popular choice to help smooth and tone skin. It has a powerful aroma and if uplifting as well as great for the skin. This essential oil is beneficial for all skin types, but it’s especially good for skin that’s either oily or dry.
- Add a few drops of this essential oil to a DIY face mask or use it during a stress reducing facial massage.
- Add 4–5 drops to a water bottle with 2 ounces of water. Spritz lightly over skin for a refreshing, revitalising effect.
If you would like to try the YL Geranium, please click here
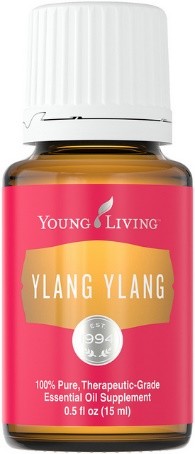
Known for its sweet floral fragrance, Ylang Ylang essential oil also helps moisturise and revitalise skin.
This uplifting essential oil is great for all skin types, but it especially benefits dry or mature complexions.
- Add 5 drops into 10 mls. of carrier oil, such as V6 Enhanced Vegetable Oil Complex, or some good quality jojoba and incorporate into a relaxing massage at the end of the day.
Add 2–3 drops to your bathwater (in a teaspoon of milk).
Add a few drops to your face cream or body lotion and gently massage into skin.
If you would like to try the YL Ylang Ylang (distilled in Equador!), then please click here
Reference: Adapted from the Young Living Blog

Suzie Webb
Clinical Aromatherapist, Nutrition Consultant
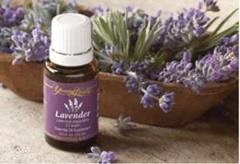
Essential Oils Your Skin Loves
For centuries many cultures have looked to essential oils to enhance their daily lives, perform religious rites, support wellness, and wear as perfumes. Not only are essential oils extremely versatile but many also contain naturally occurring constituents that are practically made for one particular usage: beautifying the skin.
Unlike skin care products that rely on harsh and synthetic ingredients, essential oils use their natural properties to brighten, smooth, and moisturize the appearance of skin in a way that leaves you feeling perfectly pampered.
Check out some skincare favourites to get your glow on!
1. Lavender
Lavender essential oil is the perfect place to start and a must-have in every home. This popular essential oil soothes and nourishes all skin types and is easy to incorporate into your skin care regimen every day.
- Add a drop to your hand, mix with facial moisturizer, and treat your skin to a mini facial massage.
- Make a basic homemade body scrub by combining coconut oil, sugar, and Lavender essential oil.
Start with 3–4 drops and gradually add more as desired.
Create a spa-like retreat by combining 1 cup Epsom salt and 4 drops Lavender and adding to a hot bath.
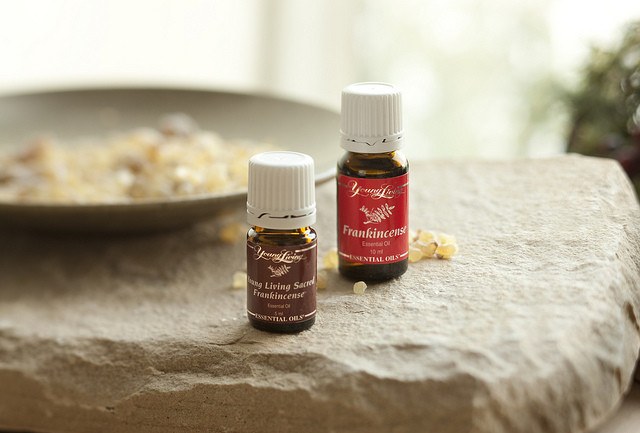
Frankincense essential oil has been sought after since ancient times for its many benefits, including its rejuvenating and beautifying properties. Great for all skin types—but especially beneficial for mature complexions—this luxurious oil helps moisturize and smooth the skin.
- Boost your skin’s radiance by massaging a drop of Frankincense into facial skin after cleansing, followed by applying your regular moisturizers.
Add a few drops to your face cream or body lotion and rub directly into skin.
Massage into the skin on hands and feet after a long day to restore skin’s texture.
Great for smoothing and nourishing all skin types, Cedarwood essential oil is a very versatile oil with a rich, woodsy aroma. Because this oil also benefits hair, it’s a great choice for nourishing skin on the scalp.
- Smooth skin on the face or body by adding a few drops Cedarwood to your favourite lotions.
- Add 3–4 drops to a bowl of hot water. Cover your head and the bowl with a towel and breathe deeply and slowly for several minutes to open pores and enjoy the calming aroma. Follow up with a facial massage that includes 1 drop of Cedarwood oil. Mix 5–6 drops of Cedarwood with a small amount of coconut or Argan oil. Massage into your scalp 30–60 minutes before showering, then wash and rinse hair as normal.
I would recommend these are the first 3 essential oils to add to your collection if you intend to start making your own chemical free cosmetics.
If you would like to buy some YL Frankincense essential oil, you can do so here
If you would like to buy some YL Cedarwood essential oil, you can do so here
Reference: Adapted from a YL blog
 Suzie Webb
 Clinical Aromatherapist & Nutrition Consultant
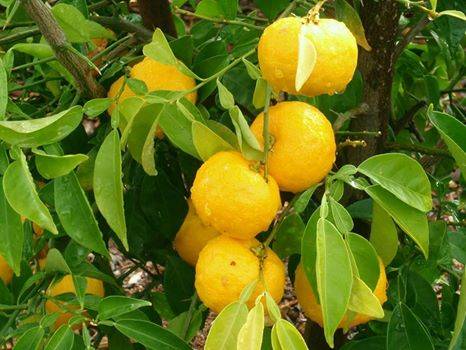
Did you know that some citrus essential oils are not phototoxic? If you’ve been avoiding all citrus oils out of concerns over phototoxicity, you can still use a few citrus oils without worrying about potential phototoxic skin reactions.
Whilst marking one of my students case studies the other day, I observed that very few citrus oils were being used in her blends. On asking her why she told me of her fear of using citrus oils in case she caused a phototoxic reaction to one of her clients. Maybe I was a bit too enthusiastic when teaching about the safety of essential oils!
I was pleased this came up as it gave me an opportunity to clear up the safety rules around phototoxic oils for this particular student, and for everyone else using essential oils.
Can you safely use phototoxic essential oils in topical blends - blends that are put directly on the skin?
Yes, absolutely!!
Before I explain how, let me explain what it means for an essential oil to be phototoxic.
Phototoxic essential oils can cause skin reactions in sunlight and UV light (such as tanning beds). These reactions are no fun, and some people choose to avoid using citrus essential oils in topical blends altogether just to be on the safe side.
But there’s good news! You can “be on the safe side” and still use citrus essential oils!
First of all, there are some citrus essential oils that don’t cause phototoxic reactions at all. These are:
- Green Mandarin (Citrus reticulata)
- Distilled Lime (Citrus aurantifolia)
- Sweet Orange (Citrus sinensis)
- Yuzu (Citrus junos)
- Tangerine (Citrus × tangerina)
Did you notice I pointed out that distilled Lime is not phototoxic? That’s because Lime is unique—it can be cold-pressed or distilled, and the production method determines whether it’s phototoxic. Cold-pressed Lime is phototoxic, but distilled Lime is not. Other citruses (like Lemon) can be distilled as well, but it’s not a common practice.
Now I've pointed out the citrus essential oils that aren’t phototoxic. What about the ones that are? You can still use those in topical blends, as long as you dilute them in carriers appropriately.
Here are the guidelines for each phototoxic oil and how many drops you can safely use in 1 oz (30 ml) of carrier.
- Cold-Pressed/Expressed Bergamot – 2.4 drops per oz (Just use 2 drops to keep it simple)
- Cold-Pressed/Expressed Lemon – 12 drops per oz
- Cold-Pressed/Expressed Lime – 4.2 drops per oz (Just use 4 drops)
- Cold-Pressed/Expressed Grapefruit – 24 drops per oz
As long as you stay within these dilution guidelines, feel free to use these citrus oils in your topical blends. Don’t let the word “phototoxic” make you shy away.
Citrus oils want to inspire happy feelings! They’re wonderful in body oils and lotions, digestion creams, and pain relief blends. Just be mindful of how many drops per ounce you’re using, and you’ll do just fine.
References:
Robert Tisserand and Rodney Young’s book - Essential Oil Safety: A Guide for Health Care Professionals, 2nd Edition
Has Anyone Ever Died from Essential Oils?
Over a 2 year period from 2010-2012 there were zero deaths from essential oil use as reported by the NPDS (National Poison Data Systems) as put out by the annual report from the American Association of Poison Control Centres. On the flip side, during 2010 alone there was reported to the CDC (Centre for Disease Control), 40,393 drug-induced deaths in just the United States. The CDC also states that 44 people in the United States die every day from overdosing on prescription painkillers. Every day!
JAMA (The Journal of the American Medical Association) did a study from 1993-1998 and found 212,000 deaths in the United States from physician administered procedures as well as properly administered prescription drugs. Essential oils in a negative light are nowhere to be found on the internet database of the CDC, but interestingly they are called out as potentially toxic by the FDA. Money plays a large role in our lives and has a lot of power.
The actual deaths from essential oil are incredibly small and, to date, only a scant few have been reported over the last one hundred years. A couple of children who somehow were able to ingest 1-2 ounces of an essential oil (Eucalyptus was sited in one report and Wintergreen in another). Two adult deaths were reported from women trying to abort their unborn babies. They drank an entire bottle of Wormwood, successfully killing their unborn baby as well as themselves.
As you can see, deaths from essential oil use are extremely rare and the ones that have been reported are from a major lack of common sense. As adults we need to keep essential oils out of reach from small children and we need to educate our older children of their proper use. While essential oils are powerful, when used properly and from a reputable company that only provides the purest oils, they will only enhance your health rather than hinder it.
Reference: The Essential Oil Truth - The Facts without the Hype - by Jen O'Sullivan
Ravensara and Ravintsara - the differences
I am going to attempt to explain the differences between these two oils, as there is so much confusion over them. Ravintsara essential oil should never be confused with ravensara essential oil and substituting one oil for the other is never an option, as their therapeutic properties are very different from each other.
Let's start with a little botany! Plant naming and the use of botanical Latin can be daunting to beginner and experienced aromatherapists alike. Nonetheless, the science of classifying living things (taxonomy) is essential to our understanding of the natural world. Without the botanical Latin name, how can you be entirely sure of which essential oils you are buying and more importantly, using in your practice.
I'll state again, as I do very often! that it is of paramount importance for us to know the botanical names of the oils we are using in our practices. Do not consider buying a essential oil without researching first exactly which one you want and why you want it. You need to keep in mind all the different chemo types too. Do not go shopping for essential oils until you have done your homework.
The first difference is the botanical name:
Ravensara (Ravensara aromatica) is distilled from the leaves and branches of a tree by the same name - indigenous to Madagascar.
Ravintsara (Cinnamomum camphora) is distilled from the leaves of the camphor tree, which originated in Japan and China.
Ravintsara is not therefore indigenous to Madagascar but was introduced from China in the early 1800s. It's a species* of Cinnamonum camphora which lost its ability to produce any camphor under the Madagascan climate.
For many years, oils from both Ravensara aromatica and Cinnamomum camphora were distilled and traded on the market as Ravensara with a reference to either botanical name. It is only a few years ago that research into the chemical makeup of these oils has finally given them their distinctive individual botanical identity.
So whilst Cinnamonum camphora is now grown in Madagascar, it is very different to the Cinnamonum camphora grown in China - because of the different climate and therefore producing a chemo type.
The next difference is the main chemical compounds of the oils:
Ravensara is generally high in monoterpenes, such as limonene and sabinene, giving this oil antibacterial and immune supportive properties. Its aroma is fresh, earthy and green.
Ravintsara on the other hand, is known for being very high in 1,8 cineol, making it supportive for respiratory issues and as a decongestant. Its aroma is vibrant, clean and very similar to Eucalyptus.
So! If you see a bottle of essential oil labeled Ravensara, and it advertises a high chemical composition of 1,8 cineol (say 50%-60%) then this essential oil will most certainly be Ravintsara, not Ravensara (as Ravensara is high in monoterpenes, not 1,8 cineol).
Now I'm going to make it more confusing!
Ho Wood Essential Oil, Cinnamomum camphora ct linalool, is steam distilled from the bark and wood (and sometimes the leaves are simultaneously distilled) from the same tree that brings us Ravintsara. Ravintsara Essential Oil is distilled from the leaves of Cinnamomum camphora and is sometimes known as Ho Leaf Oil.
Surely the easiest thing to do, to stop all this confusion, is that oils from the Cinnamomum camphora tree we always call Ho Leaf, or Ho Bark essential oil and the oil from Ravensara aromatica tree we call Ravensara - forget the name Ravintsara totally! to save confusion - when you see Ravintsara, think Ho Leaf!
So!!! When you are buying Ho Leaf (which will no doubt have Ravintsara on the label!), the label should read:
Ravintsara - 100% Pure Essential Oil. Cinnamomum camphora (c.t. 1,8 cineol) **
Calling Ho Leaf oil 'Ravintsara' is just confusing for everyone.
*Species - species are groups of interbreeding populations, which are reproductively isolated from other species.
** 1,8 cineol is also known as also known as 'eucalyptol'

Essential Oils for Travelling
I love travelling, and do a lot of it! but sometimes have the problem of being unable to take as many essential oils with me as I would like! With hold luggage there is no problem to the amount I can take, but I frequently travel with hand luggage only, and once almost had some of my oils taken away as I was over the allowed limit for liquids. To resolve my problem, I’ve started making up some inhalers. I bought the ones in the picture from Purple Flame Aromatherapy (one of the first Aromatherapy Courses I did back in the 1980s!), and they were about £10 for 10 including tax and postage via Amazon.co.uk.
The inhalers are small enough to pass through security with no problem – as the eco-friendly absorbent cotton wick absorbs the oils so they are no longer classified as a liquid. They take about 10 minutes to make, and can last up to 3 months with daily use!
The first inhaler recipe I made, I called ‘Stress Buster’. The blend is for respiratory support – I use 5 drops of Frankincense (Boswellia caterii), 6 drops of Eucalyptus (Eucalyptus globulus), and 4 drops of Orange (Citrus sinensis). I mix all the oils together in a small dish, then soak the cotton wick in it and insert into the inhaler – easy! and one I never travel without.
The second inhaler I made I called my ‘Immune Support’ – again I used 15 drops of essential oil and I either alternate with my Stress Buster or use it if I’m sitting next to someone coughing and sneezing!!! In my Immune Support inhaler I put 6 drops of Lemon (Citrus limon) 2 drops of the YL Thieves blend, and 7 drops of Oregano. This is quite a potent blend but one I love and use whilst sitting on a crowded plane or generally anywhere that is busy with people – airports, train stations and shopping malls!!Another product I make for travelling is a room spray. Using just 1oz of water it makes my hotel room smell more like home! but cleanses the room at the same time! Into 1 oz of water (30 mls) I add 3 drops of Cedarwood (Juniperus virginiana) and 3 drops of Mandarin (Citrus reticulata)
Added to these 2 inhalers and the room spray I always travel with the YL Thieves hand cleanser and spray – the spray I use to spray on loo door handles and flush handles! Better to be safe than sorry! Safe and Healthy Travels!
Re-posted from my website Suzanne Le Quesne as I am often asked about oils for travelling.

I recently attended the International Federation of Aromatherapists AGM and in the afternoon we had a speaker talking to us about Frankincense resin.
I have some Frankincense resin, that I usually pass around during my Healing Oils of the Bible workshops but I rarely burn it, as I always diffuse my Frankincense essential oil, so I was interested to smell the aroma of the resin and to hear about the different grades of resin available.
We were shown about 14 different resins! Before the resin is packed they are all carefully separated by colour size and smell. This process is called ‘Grading’ and can take from a couple of weeks up to a month. Grading is a unique technique advanced by The Frankincense Store in Notting Hill, London, to bring out the natural qualities and aroma of the resins. It is only the Omani Boswellia Sacra Frankincense that they spend time grading on. Grading can be a very complex task, as every harvest produces different qualities.
Omani Frankincense has been classified into four types according to region of growth.
The finest quality is Hojari, which is from the trees that grow in the Eastern part of Dhofar.
The second grade is known as Najdi, which grows in the Najd area, north of the Dhofar Mountains.
The third class is called Shazri, and its trees grow in the western area and
the fourth quality is called Shabi, whose trees grow in the coastal plain where rainfall is adequate.
On each visit to Oman choosing the sacks personally by Shehbaz Khan is very important to The Frankincense Store, so they know what to expect from each harvest and from what region they are from. The Omanis have their own grading system which works for them. However The Frankincense Stores' complex grading technique has advanced so much that some of their grades are not even available to purchase in Oman.
After choosing the sacks they are shipped to The Frankincense Store's warehouse in the UK and on arrival each sack is graded 1 by 1. All the grading is carried out by store founder Shehbaz Khan, who takes 8 hours a day to grade a 40 kg sack. Firstly all the powder is removed by sieving it from the resins. Simultaneously all the smaller granules are too removed out. Then all the tree bark and any other bits such as stones and twigs.
Followed by the deep concentration of separating every piece by shape colour size begins in natural daylight. The light must be right for them to bring out the best in quality. Too bright and all the colours look the same, too dull and you cannot see all the colours. They look out for our rare Green Hojari Frankincense, which has amazing medicinal properties. All the different grades are sorted into baskets which are then packed into their hessian and retails packs. Sometimes the baskets have to be re-graded to ensure that our resins stay constant in quality. However as all their resins are 100% natural and organic and there will always be slight differences in quality and appearance with every new batch of Frankincense.
The entire process from buying , grading , packing and selling is carried out manually and no machines are used.
Traditionally Frankincense has been burned on charcoal for its aromatic smoke. It also had been since ancient times been used as medicine by taking internally. There are only three types of Frankincense from their range you can digest, and they are the Yellow, Green and Royal grades. All three can be chewed like a sweet or made in to a drink.
How to burn Frankincense resin. Firstly make sure you have a heat proof incense burner. Teracotta is the best material as it can withstand the heat. Use a lighter to heat the charcoal held with a pair of tongs. Place the charcoal onto the incense burner. Wait for the charcoal to fully heat which takes about 30 seconds. Choose your favourite Frankincense resin and place a small tear drop on top of the charcoal. Sit back and enjoy the aromatic smoke.
There are 3 ways to take Frankincense internally. the first way is to just simply chew on a raw piece of Frankincense. No need to wash it , just simply pop it into the mouth and start chewing. The other two are as a drink. To make Frankincense in order to drink it, can only be made with yellow, green and royal grades as these are the three therapeutic grades and have many healing properties.
Frankincense Tea - Pour 3-4 mugs of water into a saucepan. Heat the water and bring to the boil. Drop one piece of Frankincense resin preferably the size of a cashew nut into the pan. Stir continuously until resins dissolves into the water. The resin is very sticky and will leave residue on the side of the pan which is difficult to remove. Try to use all of the resin to dissolve in the pan. Once dissolved pour into a mug. Any small bits of resin are total fine to consume in the drink. We advise you use a pan sole for the use of Making Frankincense Tea. Can be drunk at any time of the day best results are in the morning or night on an empty stomach. Once a day is enough for treating an illness, otherwise every 2 days is great for health.
Frankincense Water - Use a 1 liter bottle of mineral or spring water to add a piece of Frankincense resin. Leave the bottle at room temperature for 24 hours and then place in the fridge. You can drink the water as much as you like through out the day as ordinary water. When the bottle becomes empty simply pour the resin into another bottle or top up the same bottle with water. Repeat the process again. The same resin can be used until the water no longer becomes cloudy. Maximum time for storing the resin in the water is approximately 3 months. Frankincense water is very refreshing and rejuvenating.
References: The Frankincense Store, Notting Hill, London.
The Art of Blending with Essential Oils
I recently bought a really useful book entitled The Art of Blending with Essential Oils by Debra Raybern which I found really inspiring and which contained a lot of information not normally found in other books, so I thought I would share some of the information for you to enjoy too.
When teaching blending teachers will first inform their students about 'notes', base, middle and top notes. They may also say there are many different things to think about when blending for example if it is for a perfume or is it for a room freshener - but in all my years of practicing, learning about and teaching aromatherapy, I have never come across 'rivers'. Here is an except fro Debra's book.
"Ylang ylang, myrrh or black spruce are often used as a 'river' for a blend. Black spruce and rose are known to amplify the frequency of any blend to which they are added. Myrrh is known to make a scent last longer. A river essential oil is much like a carrier oil in a blend: it acts to transport or carry the other essential oils, allowing them to blend better for fragrance purposes".
Tips for successful blending:
The No. 1 rule in blending: Keep a blending journal - whether your blend is for for a perfume, for a sleeping aid or for a room freshener, you'll benefit from keeping a record of the exact drops you used of each oil, and of course your chosen carrier oil, if you used one. This way you won't end up with an aroma that you love but can't reproduce. If you always keep a record of all your blends in a journal - the good ones and not so good ones - once you've perfected your blend you will be able to re-create it. Buy yourself a beautiful journal book - not too small as if you are a student you will be using it a lot to do your case studies! I still have my original journal from when I trained with Eve Taylor in 1990!
Another quote from Debra' book:
"Let it rest! it's a good idea to put a new blend away for a few days or even a week. Let the scents meld together and get comfortable with each other. Sometimes they change in ways you like. Sometimes one note becomes too strong and needs to be softened with another oil. Make a blending journal entry to adjust your blends accordingly".
One last quote from Debra's book - I love this one! and again have never heard about the coffee or the arm pits!
" The Nose Knows" Become familiar with the scent and character of the oils. Inhale the essential oil and note how it makes you feel. Is the scent calming, uplifting, focused, sensual, happy, motivating or energising? Note the aroma - is it light, fresh, strong, sweet, green (like fresh mown grass) etc?
To test an aroma of an individual essential oi, breath directly from the bottle in the following manner: hold the bottle chest high, and gently swirl the essential oil in the bottle to stir up the molecules. Bring the bottle slowly to your nose, breathig deeply the entire time. how does it smell: how does it make you feel?
When testing several blends, you may experience olfactory overload. After a while you may no longer even be able to smell them! This is common and you can restore your sense of smell by sniffing fresh ground coffee beans, taking a break outside in the fresh air for at least 30 minutes, or the simplest method: smell your armpit (as long as you care not wearing a synthetically or strongly fragranced deodorant). It's true - it really works and it's always with you!
That's all for this post, but I'll continue with more on blending with the next post.
Diffusing Essential Oils
We use diffusers to diffuse essential oils into our home, office, school, car or any inside environment - to purify the air and to give us an uplifting or a relaxing effect to the environment in these places.
There are many diffusers available and they come in all shapes, sizes and cost! A cheap option would be something as simple as the candle diffuser. I personally don't recommend these as some people use the oils neat in the little dishes that come with these diffusers, when in fact they should be added to cold water. The candle warms the water and the essential oil molecules drift into the air. However, the neat oils or the water may become too hot and then the chemical structure of the oil changes, and this isn't recommended. Hot water is also a health and safely issue in the home so another reason for me not to recommend this type of diffuser. However, some of these diffusers are really pretty and I would only recommend their use if under constant supervision by a responsible adult, and topped up regularly with cold water, before the original water drys up. in 100ml of water, use 1 - 4 drops of essential oil.
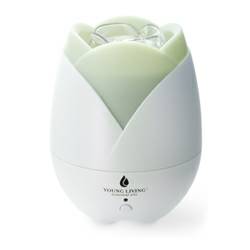
My favourite type of diffuser is the cold water diffuser (an aerial diffuser) (pictured) and this is where you would add the desired amount of cold water and add either your selected single essential oil or a synergy of oils to the water. This is the mildest form of diffusion. When turned on, the vapour enters the room, with the tiny molecules of essential oil in the vapour. The main reason we would use aerial diffusion or dispersion into our environment is typically because we want to affect emotions or to have an up-lifting or relaxing effect. This type of diffuser is also great for helping people who have difficulty getting to sleep. You could diffuse a synergy of essential oils into your bedroom about an hour prior to going to sleep just to help with the sleeping. If you have trouble getting to sleep or staying to sleep, it can also be very useful. Many of the varieties on the market have a timer with them, so you can choose to diffuse for an hour for example, and it turns itself off. Some have pretty soft lights with them, with an option to have on or off, and some have beautiful music too and most have a health and safety mechanism with them, so that when the water is gone, it turns itself off.
These 'cold water' diffusers can also be used to break down airborne pathogens, to eliminate household smells from animals, cooking or smoking, or sports shoes! One of the reasons I like this type of diffuser the best is that it is totally safe. If knocked over by a child, an elderly person or a pet, then the water is cold and there will be no harm done.
Another type of diffuser is called the glass nebulising diffuser. With this type of diffuser you put your essential oils into a small piece of glass, and turn on - there is no water involved. This is the strongest form of diffusion. It disperses the essential oil molecules into the air without water. It actually is seen as a more clinical way of diffusing essential oils into your environment and often found in aromatherapy treatment rooms. Usually this type of diffuser would be used 3 times a day for a maximum of 3 times a day - and because the oils are neat, pets should not be in close proximity of the diffuser for any length of time.
Another inexpensive but effective way of diffusing essential oils is to make an aromatherapy inhaler. They are easy to make and easy to use. They can be used for anxiety, stress, or to simply support body systems. You can buy empty inhalers from many places, I recommend Purple Flame Aromatherapy, but always make sure that the inner cotton is certified organic cotton (as cotton is considered a 'dirty' crop as it is heavily sprayed with pesticides).
How to make an inhaler - Use approximately 30 drop of essential oil. Combine the essential oils in a saucer and mix well. Place the organic cotton pad in the saucer and saturate it, using tweezers, until all the oil has been taken up by the cotton. Put the saturated cotton pad into the inhaler and place the bottom cap onto the tube. Put the cap/lid onto the inhaler and it is ready to use. Don't forget to label it! I would recommend that you use this inhaler about 2 or 3 inches away from the nose, and just waft the inhaler under the nose to breath in the essential oil molecules. I wouldn't recommend you actually put the inhaler up your nose and breath in - if you wanted to use it this way, I would recommend you use less essential oil - maybe 15 drops and not the 30 drops. Remember the saying 'less is more'.
Suzanne's recommendations for diffusing (these tips were originaly from Jen O'Sullivan and have been amended slightly)
1. I would recommend you do not, put 2 or 3 single oils in a diffuser - as the oils don't synergise well this way. I would recommend that you blend these oils first in a bottle - leave to mix or to 'synergise' for 24 hours - then use that synergistic blend to add to your diffuser.
2. If you use a pre-blended oil in your diffuser, I would recommend you only use the blend - Thieves for example, or Purification - these blends have been blended for a particular reason, so there is no need to add any other oil to them, and I would never put two blends together - to me that is defeating the purpose of the original blend.
3. Always follow the manufacturers instructions re cleaning. I use Thieves cleaner for mine, but usually 'rubbing alcohol' is recommended for cleaning. If you don't clean your device, you may get a build-up of essential oil, and then you will not get the best from your diffuser.
4. Take care of where you place your diffuser - especially the ones that use water, as when the vapour 'lands', if you have your diffuser on a wooden table, for example, over time the oily residue from the vapour may ruin your table! :-( so always put your diffuser on a non-organic surface - strong plastic for example - so although I am totally against plastic, sometimes there is a need.
5. There are a lot of negative stories going around about diffusers and pets - and that pets will get ill if they are in rooms with diffusers. It is all about being responsible! A water based diffuser like the Dewdrop diffuser for example is designed to be used in a 10' x 10' room and not to be on all day. Animals especially cats, do not have the enzymes to breakdown the inhaled essential oils in their bodies, however, in a large room, with the diffuser being used responsibly, there is very little chance that your pet will suffer. To have an adverse effect, your pet would have to be sitting right next to the diffuser all day!
6. Use the right amount of essential oil - as a general guide use 1 - 4 drops to every 100ml of water. So, the Dewdrop diffuser, for example, filled up to the red line, is approximately 400ml so for that diffuser you can use from 4 - 16 drops of essential oil. For the Aria diffuser, the water well is much bigger,therefore you can use more drops of essential oil, but remember the Aria is for a larger room.
Enjoy your diffusing! :-)


 Welcome to my Blog! I'm Suzie Webb you can read more about me